
| 일 | 월 | 화 | 수 | 목 | 금 | 토 |
|---|---|---|---|---|---|---|
| 1 | 2 | 3 | ||||
| 4 | 5 | 6 | 7 | 8 | 9 | 10 |
| 11 | 12 | 13 | 14 | 15 | 16 | 17 |
| 18 | 19 | 20 | 21 | 22 | 23 | 24 |
| 25 | 26 | 27 | 28 | 29 | 30 | 31 |
- 블로그만들기
- 해쉬
- 버블정렬
- TypeScript
- styled-components
- never타입
- nextjs
- 그리디
- 빅오
- 투포인터
- 스택
- JavaScript
- 슬라이딩윈도우
- react-query
- cookie
- nestjs
- js알고리즘
- next.js
- 큐
- textarea autosize
- 정렬
- 알고리즘
- typscript
- react
- tailwindcss
- NextAuth
- Algorithm
- isNaN
- aws lightsail
- 라이프사이클
- Today
- Total
far
[Nest.js] Swagger 사용하기 본문
Swagger란 위키백과의 설명에 따르면 REST 웹 서비스를 설계, 빌드, 문서화, 소비하는 일을 도와주는 대형 도구 생태계의 지원을 받는 오픈 소스 소프트웨어 프레임워크이다.
원래는 정말 간단하게 만들고 끝내려던 작업이라 postman만 사용하려고 했는데, 생각보다 기능이 많아질 것 같아서 Swagger도 설치하기로 했다.
npm i @nestjs/swagger swagger-ui-expressSwagger를 설치해준다.
// util/swagger.ts

import { INestApplication } from '@nestjs/common';
import { SwaggerModule, DocumentBuilder } from '@nestjs/swagger';

export function setupSwagger(app: INestApplication): void {
  const options = new DocumentBuilder()
    .setTitle('My-Blog Swagger Docs')
    .setDescription('My-Blog API description')
    .setVersion('1.0.0')
    .addTag('swagger')
    .build();

  const document = SwaggerModule.createDocument(app, options);
  SwaggerModule.setup('api', app, document);
}
src안에 util이라는 폴더를 만들고 swagger.ts파일을 만들어 준 뒤 위와 같이 써준다.
SwaggerModule.setup('api', app, document)의 api부분이 swagger에 접속할 경로가 된다.
// main.ts

import { NestFactory } from '@nestjs/core';
import { setupSwagger } from 'src/util/swagger'

async function bootstrap() {
  const app = await NestFactory.create(AppModule, {
    logger: new AppLogger(),
    cors: true,
  });

  // ... 생략

  setupSwagger(app);

  await app.listen(port || 3065);
}
bootstrap();
main.ts에 아까 만든 setupSwagger를 추가해준다.
// user.controller.ts

import { Controller, Post, Body } from '@nestjs/common';
import { ApiTags, ApiOperation, ApiCreatedResponse } from '@nestjs/swagger'

@Controller('auth')
@ApiTags('User API')
export class AuthController {
    constructor(
        private userService: UserService,
        private commentService: CommentService,
        ) { }

    @Post('/signup')
    @ApiOperation({ summary: '회원가입 API', description: '사용자 생성' })
    SignUp(@Body() authSignupDTO: AuthSignupDTO): Promise<void> {
        return this.userService.SignUp(authSignupDTO);
    }

    // ... 생략
}
Controller파일에 가서 ApiTags, ApiOperation를 작성한다.
ApiTags가 카테고리 분류가 되고, ApiOperation이 CRUD Operation에 대한 부가설명을 해준다.
그리고 접속 링크 뒤에 SwaggerModule.setup('api', app, document)의 'api'부분에 적은 주소를 입력한다.
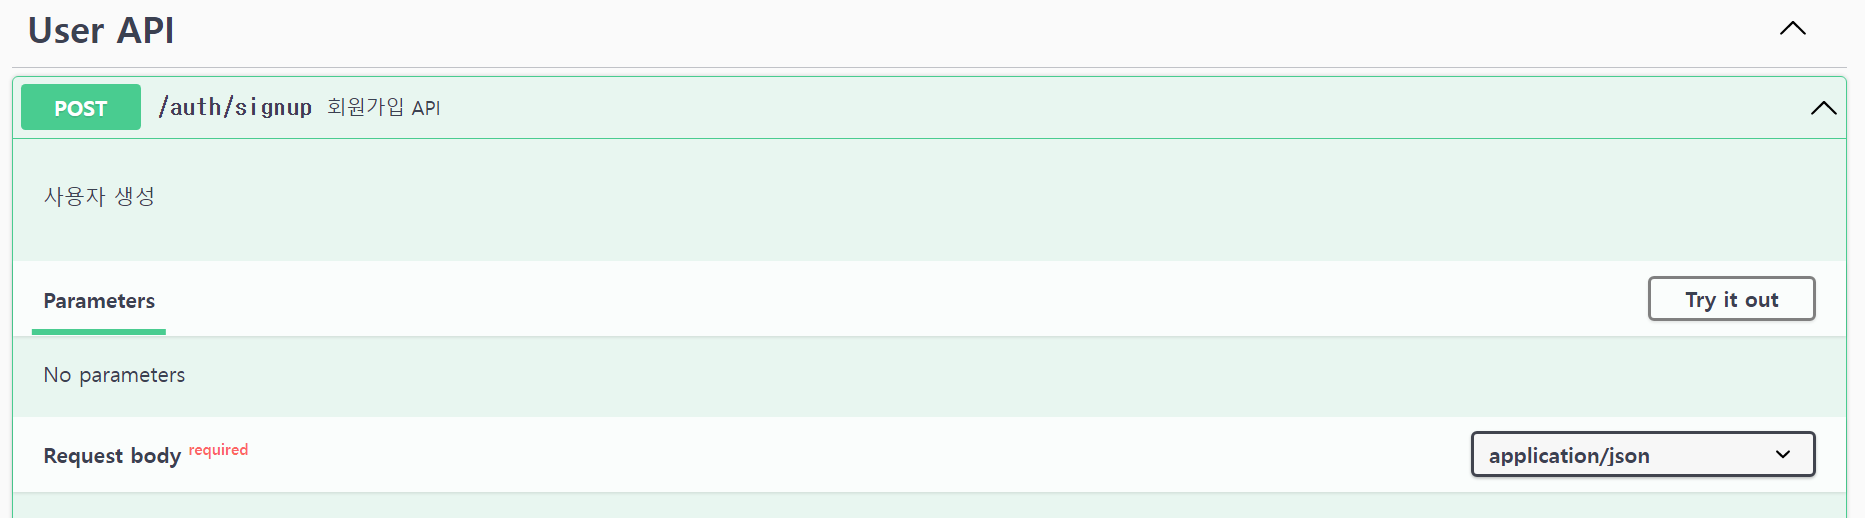
그러면 이렇게 Swagger를 사용할 수 있다.
하지만 이러면 Schema가 나오지 않기 때문에 몇가지 데코레이터를 추가해줘야 한다.
// user.controller.ts

@Post('/signup')
@ApiOperation({ summary: '회원가입 API', description: '사용자 생성' })
@ApiCreatedResponse({ description: '201 사용자 생성', type: User })
SignUp(@Body() authSignupDTO: AuthSignupDTO): Promise<void> {
    return this.userService.SignUp(authSignupDTO);
}
ApiCreatedResponse를 추가해주어 Response에 설명과 User라는 정보를 추가한다.
// user.entity.ts

@Entity('user')
@Unique(['email'])
export class User extends AbstractEntity {
    @Column()
    @ApiProperty({ description: '이메일' })
    email: string;

    @Column()
    @ApiProperty({ description: '닉네임' })
    nickname: string;

    @Column()
    @ApiProperty({ description: '비밀번호' })
    password: string;
}
user.entity.ts에 ApiProperty로 Schema의 설명을 추가한다.

그러면 이렇게 User의 Schema를 볼 수 있다.
마지막으로 Request body에 정보를 넣어야한다.
// auth-signup.dto.ts

export class AuthSignupDTO {
    @IsString()
    @ApiProperty({ description: '이메일' })
    email: string;
    @IsString()
    @ApiProperty({ description: '닉네임' })
    nickname: string;
    @IsString()
    @ApiProperty({ description: '비밀번호' })
    password: string;
}
DTO에 ApiProperty를 추가한다.
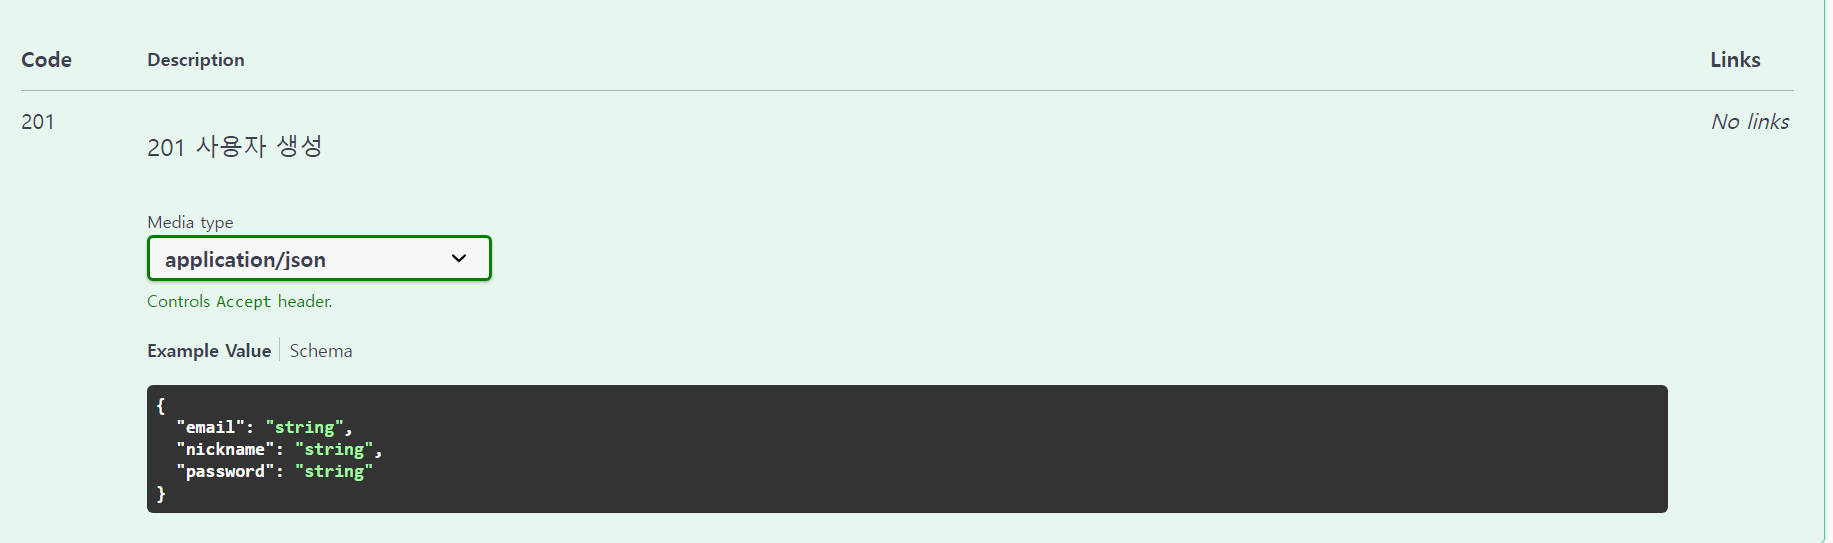
이렇게 스키마가 추가된다.
이 외의 Swagger 데코레이터는
https://jakekwak.gitbook.io/nestjs/recipes/untitled-4
위의 링크에서 확인할 수 있다.
'Nest' 카테고리의 다른 글
| [Nest.js] 순환 참조를 공통 모듈로 해결하기 (0) | 2024.09.01 |
|---|---|
| [Nest.js] dotenv로 데이터베이스 연결하기 (0) | 2023.05.03 |

