
Notice
Recent Posts
Recent Comments
Link
| 일 | 월 | 화 | 수 | 목 | 금 | 토 |
|---|---|---|---|---|---|---|
| 1 | 2 | 3 | 4 | 5 | ||
| 6 | 7 | 8 | 9 | 10 | 11 | 12 |
| 13 | 14 | 15 | 16 | 17 | 18 | 19 |
| 20 | 21 | 22 | 23 | 24 | 25 | 26 |
| 27 | 28 | 29 | 30 |
Tags
- NextAuth
- react
- 알고리즘
- styled-components
- js알고리즘
- 스택
- tailwindcss
- 큐
- react-query
- 버블정렬
- aws lightsail
- never타입
- typscript
- 정렬
- TypeScript
- cookie
- next.js
- 블로그만들기
- textarea autosize
- Algorithm
- 그리디
- JavaScript
- 슬라이딩윈도우
- nextjs
- isNaN
- 해쉬
- nestjs
- 라이프사이클
- 빅오
- 투포인터
Archives
- Today
- Total
far
[React blog] 4. 백엔드와 연결하기 본문
백엔드와 React를 연결하기 위해 데이터를 fetch 시켜야 한다. 만약 백엔드 작업이 되어 있지 않다면 axios는 건너뛰고 더미 데이터 넣어주면 된다.
npm i axios
npm i react-query
react-query를 선택한 이유는 redux가 redux-toolkit으로 오면서 보일러플레이트가 많이 줄었다고는 하나, 전역 상태를 관리하기 때문에 여전히 코드량이 많았다. 그래서 서버 스테이트를 관리하는 react-query를 사용해보고 싶었다.
아직 조금밖에 사용해보지 않았기에 장단점은 잘 모르겠으나, 확실히 코드는 많이 간결해졌다.
// configs/config.ts

export const backUrl = 'http://localhost:3065';
configs폴더를 만들고 안에 config.ts파일을 생성한 뒤 디폴트값으로 사용할 백엔드 주소를 입력해준다.
// apis/user.ts

import axios from "axios";
import { backUrl } from "configs/config";

axios.defaults.baseURL = backUrl;

export function signUpAPI(data: { email: string; nickname: string; password: string }) {
  return axios.post("/auth/signup", data).then((response) => response.data);
}
아까 만든 url을 axios.defaults.baseURL로 불러오면 API를 보낼 때 일일이 http: ~ 주소를 안붙여도 된다.
예전에 여기서 axios.defaults.withCredentials를 true로 줬다가 두번 보내지는건지 아래의 next.config.js의 설정과 꼬이는건지 CORS에러가 해결이 안돼서 엄청 헤맸던 기억이 있다.
// signup/index.tsx

import { signUpAPI } from "apis/user";
import { useRouter } from "next/router";

const Signup = () => {
  const router = useRouter();

// ... 생략

  const onSubmit = useCallback(
    (e: React.FormEvent<HTMLFormElement>) => {
      e.preventDefault();
      if (nickname) {
        signUpAPI({ email, password, nickname })
          .then((res) => {
            console.log(res);
            router.replace("/");
          })
          .catch((error) => {
            console.log(error);
          })
          .finally(() => {});
      }
    },
    [email, nickname, password, passwordCheck]
  );

}
user.ts에서 만든 api에 input값을 보내준다. 유효성검사는 취향에 맞게 추가해주면 된다.
// next.config.js

/** @type {import('next').NextConfig} */
const nextConfig = {
  swcMinify: true,
  compiler: {
    styledComponents: true,
  },
  async rewrites() {
    return [
      {
        source: '/:path*',
        destination: `http://localhost:3065/:path*`,
      },
    ];
  },
};

module.exports = nextConfig;
CORS에러를 방지하기 위해 next.config.js에 rewirtes() 부분을 추가해준다.
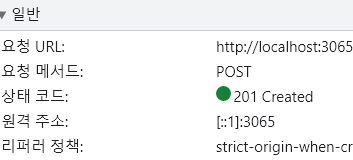
이렇게 201 Created가 나오면 성공이다.
'React > Blog만들기' 카테고리의 다른 글
| [React blog] 5. 메인화면 만들기 (0) | 2023.05.13 |
|---|
'React/Blog만들기' Related Articles
more

Comments